3D Printing for Robotic Projects
With 3D printing becoming more affordable, its potential for use in robotic applications is becoming more feasible. This article explores some of the robot-related things you can do with a 3D printer that might make you want one as another tool in your workshop.
3D Printing for Robotic Projects
With 3D printing becoming more affordable, its potential for use in robotic applications is becoming more feasible. This article explores some of the robot-related things you can do with a 3D printer that might make you want one as another tool in your workshop.
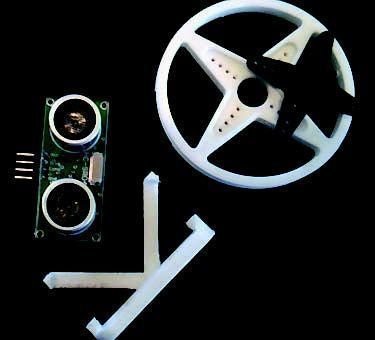
The cost of 3D printers has fallen dramatically in recent years, with many now under $200. Of course, price should not be the only criteria for picking a printer, but those issues will be addressed later in this article. With the trend for lower prices though, it makes sense for robot hobbyists to consider ways 3D printing might make their robots perform and look better and perhaps even make them easier and faster to build. A quick search of the Internet turned up thousands of robot-related parts that other people have designed (many are free). Producing them to use with your robots is as easy as downloading and printing. You can find complete robot platforms, sensor brackets, robot arms, humanoid hands, and much more. Figure 1 shows two items I printed with a Mooz-2 printer (shown in Figure 2) just to see if free options are usable. The item at the bottom of Figure 1 is a mounting bracket for ultrasonic sensors such as the Parallax PING))) or SR04. There are many variations available that provide this functionality. I liked the bracket shown because it’s smaller and less obtrusive than many others. It’s intended to fit on an RC servomotor to provide scanning capability. The wheel in Figure 1 has a recessed area exactly the same size as a standard servomotor horn (also shown). Inserting the horn into the wheel and attaching it to the servo completes the design. I was impressed by this unique mounting idea.
Customizing Your Parts
Being able to produce a part you need when you need it is a valuable capability, but customizing parts can be even better. For example, instead of using a separate encoder disk to determine a wheel’s speed and/or position, you could print a wheel with integrated encoder slots or holes. Instead of a conventional mounting bracket for your ultrasonic sensor, imagine making one that looks like a unique head with the transducers positioned to look like eyes.
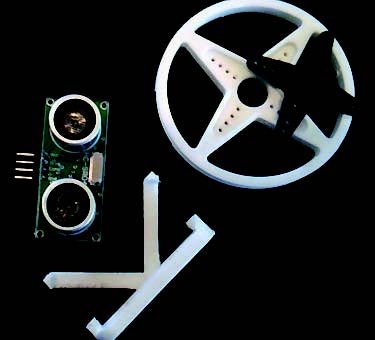 Figure 1
 Figure 2
TinkerCad
Creating custom parts was not nearly as difficult as I expected it to be. I’m sure I could benefit from one of the more expensive CAD programs, but I tried TinkerCAD and could not be happier. Not only is it free, it was extremely easy to learn and had all the features I needed to design everything discussed in this article.
Bigger Projects
One of my current works-in-progress is a walking humanoid as shown in Figure 3. It’s basically a JD robot from EZ-Robot, but with an extra joint in each leg to provide significantly more mobility. The point to focus on in this figure is the feet. Rather than create movements using a series of poses (as most humanoid projects do), I want to experiment with accelerometers for balancing. My algorithms for controlling movements require that I can tell when and where the feet are contacting the floor, so I want three contact switches on each foot: one at the front and two in the back corners. One option, of course, is to just disassemble the feet and attach limit switches similar to the one shown in Figure 4. While it’s possible to just bolt the switches directly to the feet, both the front and rear edges are tilted inward; it might be better to have a vertical mounting surface.
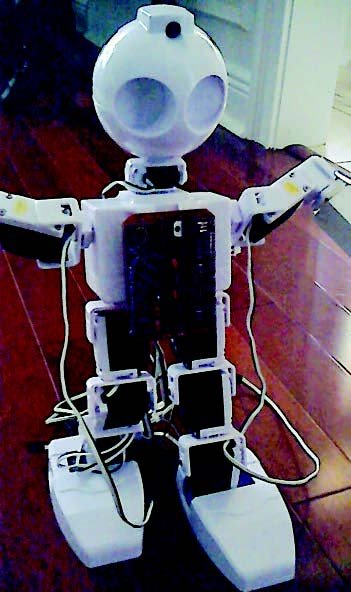 Figure 3
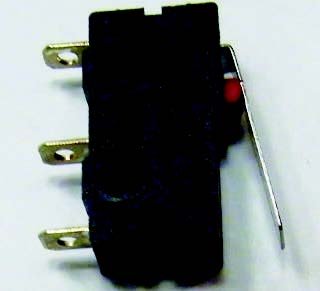 Figure 4
Multiple Options
There are many ways to solve this problem and exploring a few options can be educational for the reader. Perhaps the easiest solution would be to print small wedges (as shown in Figure 5) and glue them to the front and back edges of the foot shell. The wedges were easy to create with TinkerCAD and represent an easy and workable solution.
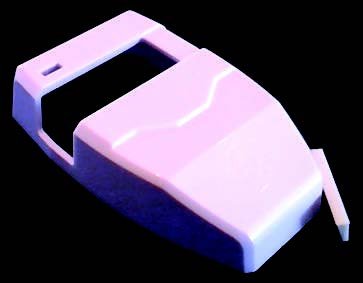 Figure 5
More Sophistication
Even though individual wedges are probably an excellent choice, I would be remiss if I didn’t mention more sophisticated options. One such solution is to simply create an entirely new shell in TinkerCAD as shown in Figure 6. This was possible because EZ-Robot (as well as a growing number of other companies) provide the STL CAD files for many of their parts. Even the relatively primitive TinkerCAD allowed me to modify the original files and add vertical surfaces to both the front and back edges (the back is shown in the figure). The printed object along with the original foot shell are shown Figure 7. Notice the sloped edge on the toe of the factory-made foot in the rear of the figure. Compare that to the toe of the newly designed and printed shell in the front. The vertical front edge is subtle and blends in nicely with the original design. The quality of the printed shell speaks well for the Mooz printer (the object shown is as printed with no sanding or polishing)
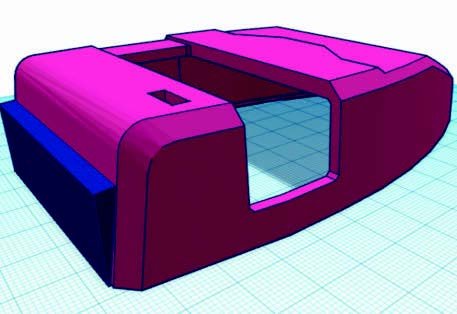 Figure 6
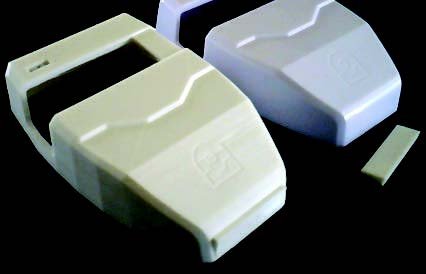 Figure 7
A More Polished Option
In all of the previous methods of attaching the switch sensors, the switches are visible. While some might like the look of exposed switches, others would prefer a more polished finished product. For that reason, I decided to engineer another option. I designed a switch cover in TinkerCAD as shown in Figure 8. It allows the switch I used to slip over the cylinders shown (no bolts necessary). If you look carefully at the figure, you can see overhanging edges at the top of both ends of the object. These allow the plate shown in Figure 9 to slide under the protrusions and lock in place. The fit does need to be perfect, so a small amount of filing (less than a minute of work) was necessary. Figures 10 and 11 show the printed objects. In Figure 10, you can see how the switch can be positioned on the cylinders. The plate is shown separately in Figure 10, and partially inserted in Figure 11. If the plate is glued to the toe of the foot shell (hot glue is easily removed if needed), then the switch module can be secured.
 Figure 8
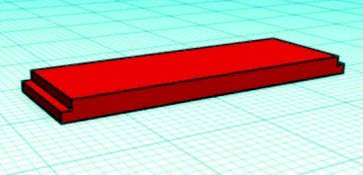 Figure 9
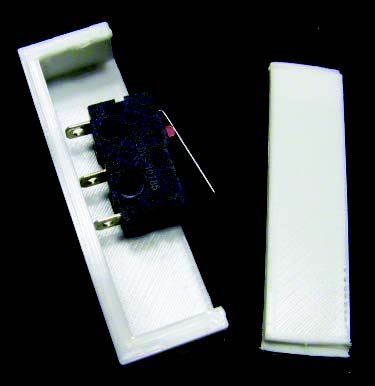 Figure 10
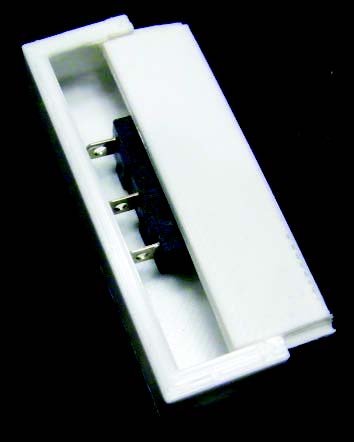 Figure 11
Printer Considerations
I’m very happy with my Mooz-2 printer. It comes in two models (Mooz-1 and Mooz-2), but either should produce the quality prints shown in this article. The Mooz-2 has one extra motor to handle the extra weight and torque needed for an optional CNC carving attachment. It’s considerably more expensive than many models and less expensive than some. When evaluating printers, I found the review comments on printers sold through Amazon to be very helpful. Anyone thinking of adding 3D printing to their robotics workshop should consider many things, with the volume of the available print area being high on the list. The Mooz area is approximately 13 cm cubed which was just barely able to print the robot foot in Figure 7. For the projects I have in mind, this is an acceptable limitation, but consider your needs when selecting a printer. Print speed and quality can certainly vary, but most any printer should provide acceptable performance in these areas — especially for hobby use. wSupport from the manufacturer, on the other hand, seems to vary considerably. This is to be expected since many 3D printers are made in China and that alone can easily add communication problems when you need help. It was obvious to me that Mooz support has tried to provide appropriate documentation (including numerous YouTube videos), but those totally new to 3D printing should be prepared to take their time and research anything about which they have questions — no matter what printer you choose. Hopefully, all foreign 3D printer manufacturers will spend more time in the future translating their documentation to English.
Conclusion
For many hobbyists, 3D printing is still a luxury. It seems obvious to me though, that it’s going to become commonplace in the not-to-distant future. I’ve tried to share some projectbased ideas and demonstrate that customization is far easier than you might imagine. Now that I’ve become immersed in 3D printing, I think new ideas and project options will become a natural part of my robot building process. If you try it, I suspect it will be the same for you.
By John Blankenship